Month: November 2021 (Page 1 of 2)

Top Winter Wedding Trends 2021

Winter weddings allow you to experiment with so many cool (pun intended) variations of themes. If you are at a standstill while planning your wedding because you just can’t narrow down theme specifics or colors, then don’t worry. Every season, there are always seem to be emerging trends that can provide inspiration for future nuptial ceremonies. Here are some of 2021’s top winter wedding trends, so you can find inspiration for your big day!


  • Rose gold/ dark wine color palette- If you want a dramatic flair of colors for you wedding reception, rose gold and dark wine are two hues that offer both glitz and romance when paired together. From floral arrangements, bridesmaid dresses, and invitations, incorporating this palette into your celebration is perfect for a winter wedding.


  • Nature-inspired theme- Think snow collecting on trees and crisp green plants with cream and white hues. A nature-inspired theme is also the perfect choice if you or your future spouse have a green thumb. Decorate your event with natural elements such as ivy, leaves, and various plants and delicate flowers. Also, use natural pine cones, holly, and other ‘wintery’ natural elements to boost the nature aesthetic and wintertime season aspect of your wedding at the same time.


  • Velvet gowns and accessories- When we think of winter, we think of cozy candlelight, warm blankets, and incredibly soft and rich velvet. Velvet is an exceedingly popular material to sport in the winter, so you may want to think about incorporating this luxurious fabric into your wedding. Not sure how to add velvet to your wedding? Think bridesmaids dresses and linens.


  • Lights, lights, and more lights- Lights seem to give a winter feel no matter what time of the year it is. For your wedding, go all out on various string lights and hanging lights. Go for plentiful candle arrangements or suspended candle detailing. Have little lights woven around your welcome sign for guests, as well as to light up trails to and from your venue. Your wedding will definitely glow!


  • Outdoor weddings- There is something about the crisp coolness of winter that is making many couples say yes to an outdoor wedding. Keep warm with heat lamps, a venue with an outdoor fire pit, a coffee/hot chocolate bar to replace (or backup) happy hour, and other cozy elements. If you want to have an outdoor wedding but want to provide a space where guests can mingle in warmth, a tented space is the perfect solution.


Having a winter wedding can open your world up to a variety of new and innovative solutions for colors and decor. If you want to forgo traditional or add some funky new elements to your wedding celebration, the list above will hopefully provide you with inspiration. If you are having an outdoor winter wedding and would like to look into professional tent rentals in Santa Barbara, Town & Country Event Rentals is the place for you. Your winter wedding will dazzle guests and most importantly, celebrate your union perfectly!

 

Why Is My Hot Water Pressure Low?

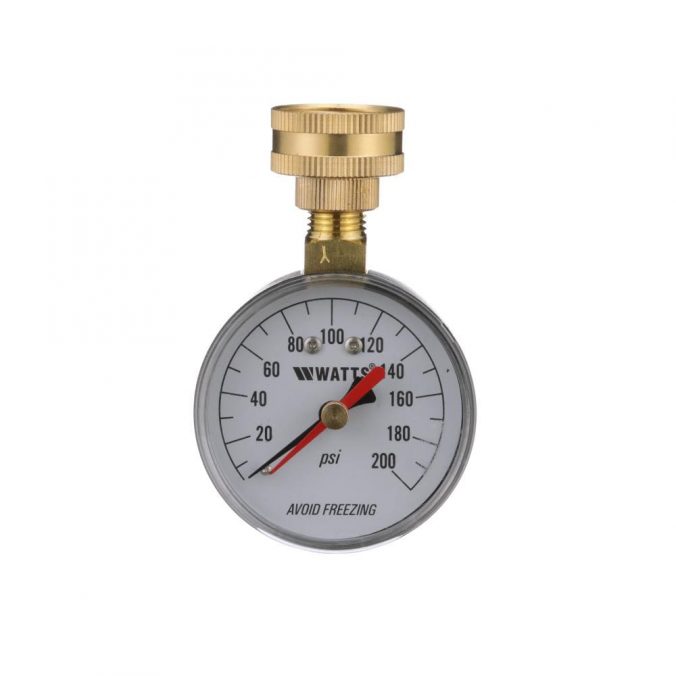
As the seasons change and the temperatures start to drop, you may be looking forward to a relaxing hot shower before bed. When you get into the shower and discover your hot water pressure is very low, this may become a huge cause of concern for you. There are a variety of reasons why your hot water pressure could be low, whether you’re in the bathroom or your kitchen. Here are some of the explanations on why your house’s hot water pressure may be quite low:


Limescale Buildup

When your household has hard water, aka water filled with minerals such as calcium, magnesium, and sodium, this can create a residue of calcium and magnesium called limescale. Limescale can coat your showerheads, appliances, sinks, and so much more. This buildup can instantly slow down the way water passes throughout your plumbing lines.


Water Valve Issues

When water is delivered to your home plumbing system from a city or county main water supply, this is controlled by the water meter valve and main shutoff valve. If you are suffering from low water pressure, there may be a possibility either of these valves are partially shut off or be broken and not open all the way.


Corroded Pipes

Particularly true in older homes, low hot water pressure can be caused by corroded pipes within a house’s plumbing system. Corrosion and limescale buildups in old steel pipes can be one of the biggest reasons for low hot water pressure, and this may mean having to replace your entire plumbing system.

Bent Water Heater Line

Most water heaters have copper water pipes that let water flow through. Copper can get easily bent and in this case can cut the flow of water down, reducing hot water pressure instantly. If you check your water heater and a line is bent, this is probably the culprit. If the bend is that not bad you may try to straighten it out, but if the line is too bent, then heading down to your local hardware store and buying a replacement line may be the solution.


Clogged Plumbing

Like with a lot of water issues, a lot of times the culprit can be a clog in your plumbing system. However, assessing the clog can take a bit longer and need the help of a professional. Call a professional and friendly plumber to help determine the clogs and right solutions so you can get your water pressure back to its best.


When it comes to hot water pressure, you always want to get to the root cause of a dip. Low hot water pressure may have a lot of causes, and sometimes it’s best to just get it assessed by a reliable plumber if you can’t figure out the cause. If you’re looking for a plumber in Riverside, The Original Plumbing Company is the perfect solution. This way you can get to the cause of low hot water pressure in your household and be given helpful advice along the way!


Easy Ways to Get Rid of Furniture You Don’t Need

Are you planning to downsize for your relocation? Do you want to get rid of old furniture so you can invest in some new and modern pieces? Even if you are moving and want to get rid of your furniture, there’s no need to stress over it. Instead of bringing old furniture out to the curb or driving it to the local dump, you should think of ways to dispose of the furniture effectively.


Here are some easy ways to remove unwanted furniture from your property without a lot of effort.


Easy Ways to Get Rid of Unwanted Furniture


Here are some great ways to get rid of old furniture:


1.   Announce a Garage Sale


Holding a garage sale is one of the best and oldest practices to get rid of furniture in no time. Organize and make a list of all the items you don’t need and then advertise the sale through friends and family. You can also use the internet and social media! Distribute flyers in your area so more people can turn up at the event. Remember not to overprice your items. Instead, give your buyers a good deal so you can get rid of everything fast.


2.   Donate Furniture


If you don’t have enough time to hold and arrange a garage sale, then think of donating it. This way, someone in need will be able to make good use of your old furniture. What a great thing!  Search the Internet for local non-profit organizations nearby so you can quickly drop off the furniture whenever convenient. Some organizations also pick up the furniture from your doorstep, which makes things even easier!


3.   List On an Online Website


Does the idea of dragging your furniture out of the house stress you out? Luckily, there are several websites online that deal in buying and selling used furniture and household items. You can register yourself on these websites and upload photos of the furniture you are hoping to sell. Once you receive a good offer in return for the furniture, you can either arrange a pickup or deliver it to the buyer through some delivery services.


4.   Give It Away


If you are in a situation where you cannot sell or donate your furniture, you can ask your friends and family if they would like to have it. You can take some pictures and videos and easily text them to your friends and family. Even though this practice might not help you make money, you will be relieved that your unwanted furniture has been put to good use.


In some cases, you will not be able to sell, donate, or repurpose your furniture. Unfortunately, this means you will need to take your furniture to the dump or simply put it out to your curb with a free sign if your neighborhood allows it. You can also call a local junk removal company to help. They typically come right to your property and haul your old furniture away.


Contact a Reliable Moving Company to Take the Stress Out of Your Next Move


For more help planning your relocation, hire reliable San Bernardino movers to handle the job!


Plumbing Tools Every Homeowner Need to Keep on Hand

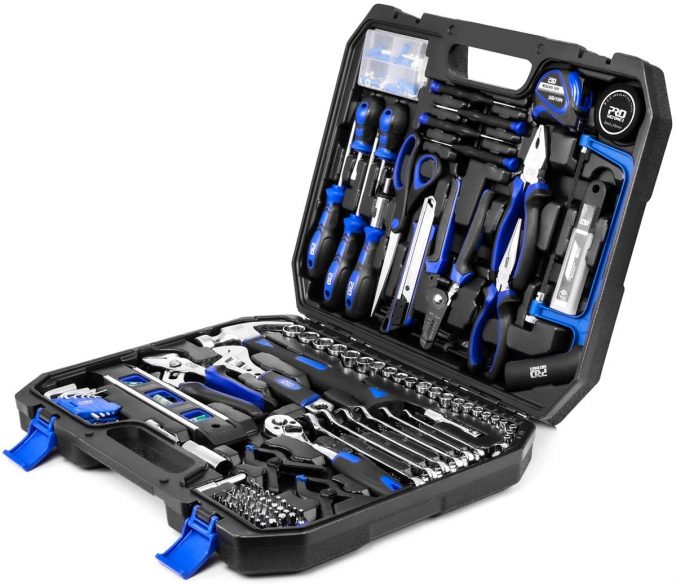
Just as you have various tools in your home for fixing minor problems, a plumbing tool kit is also essential. You don’t always need to be a professional to have plumbing tools on hand at home. Being a homeowner, you are always looking for effective ways to keep your house well-maintained and in good condition.


So, what should a typical residential plumbing tool kit include? Let’s discuss some tools to help you solve fundamental plumbing issues and are good to keep on hand for an emergency!


Plumbing Tool Kit Essentials


Your residential tool kit should include:


1.   Wrench


While you might already have a wrench in your residential tool kit, it’s a good idea to keep one close by for a plumbing emergency. A wrench set will help you fix any broken or loose toilet seats, adjust pipe connectors, and tighten faucets or fixtures. Additionally, many minor plumbing jobs require a wrench to tighten or loosen bolts and nuts. Therefore, having an adjustable wrench or wrenches in various sizes is essential.


2.   Hand Drill


If you know how to use it properly, a hand drill can eliminate the need to call a plumber to unclog your drain pipes. Using the hand crank, you can carefully enter the drain opening with the hand auger to remove the clog in the pipe. While it’s easy and quick, you need to be sure you know what you’re doing to avoid further damage.


3.   Plunger


While it might seem obvious, a plunger is a must-have tool for anyone who owns a home. If possible, you should have a plunger by each toilet in your home. You never know when a clogged toilet will arise and cause a significant issue! That’s why it’s always better to have a plunger nearby to react quickly to the problem.


4.   Pliers


Pliers help for a variety of reasons. There is always a chance that tiny or thin objects can get trapped in your drain, making it hard for you to remove them with your hands. In these cases, pliers can help you avoid a clogged drain. Keep a needle-nosed plier in your tool kit. They can also come in handy for tightening and loosening screws, bolts, and nuts.


5.   Duct Tape


Unlike other tapes, duct tape is water-resistant tape that will back you up in many ways. You can wrap duct tape around the plumbing leaks until a plumber arrives, and this can help stop the flow of water and avoid water damage to your property.


5. Caulk and Caulking Gun


Caulk and a caulking gun are undoubtedly plumbing essentials. They can help you perform quick fixes, such as sealing your toilet equipment. If a bidet, sink, shower, or toilet base needs to be adequately sealed, caulk can be your solution.


6.   Thread Seal Tape


As the name says, this thread-like tape will prevent your loose showers heads from leaking. It can also seal off faucet connectors and broken seals in your plumbing fixtures, stopping water damage and preventing more significant plumbing issues while you wait for a plumber to arrive.


While you still need to call a professional plumber for help, having these tools on hand can undoubtedly help avoid more significant issues when a plumbing emergency strikes.


Hire a Professional and Licensed Plumbing Company for Your Residential Needs


It’s crucial to hire a professional if you need work done on your residential plumbing system. Contact your local Riverside plumber to schedule an appointment for fast and affordable service.

How to Clean Your Sump Pump to Avoid Clogs

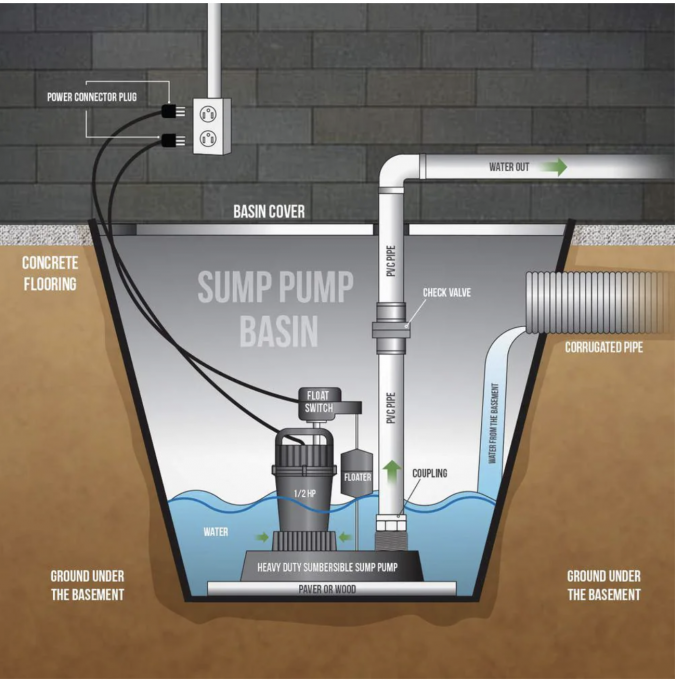
A sump pump is a pump that is used to remove water that has accumulated in a sump basin, which is typically located in the basement of homes. It helps prevent flooding in the house and eliminates moisture and buildup that has accumulated in the sump basin. If you get a sump pump installed, you won’t have to worry about flooding or structural damage, mainly when significant rainstorms occur.


As basement flooding is a common problem in most homes, sump pumps are vital. Still, they need to be taken care of properly. Let’s discuss the steps you need to take to keep your sump pump clean.


7 Steps to Clean Your Residential Sump Pump


Follow these steps to clean your sump pump and protect your property:


1.   Disconnect the Sump Pump


Before you start cleaning the sump pump, make sure you disconnect it from the power supply. You’ll also want to disconnect any other accessories like the battery and alarm. It is crucial to disconnect all the electronics because water can be harmful to them, and you don’t want to ruin them. Disconnecting the pump is also essential if you’re going to prevent electric shocks.


2.   Remove the Pump from the Discharge Pipe


Once you have disconnected the sump pump, remove the pump from the discharge pipe and carefully undo the screws and fasteners. This will allow you to separate the pump and pipe. When disconnecting the pipe, use a disinfectant or vinegar to remove the debris if you notice any buildup. This will also ensure that mold growth doesn’t quickly return.


3.   Separate the Pump from the Pit


To make sure that the cleaning is done correctly, remove the sump pump from the pit. This is the best way to clean the pump effectively. If you need more room to clean the pump, wrap it up in a plastic sheet and move to a more spacious area. This way, you won’t have to spill any dirt on your carpets or rugs.


4.   Clean the Pump Properly


To clean the pump properly from the inside, use a sponge or warm, damp cloth. This way you can easily scrape out all the dirt and debris gathered inside. If you feel too much dirt inside, use a garden hose on full pressure to remove any buildup.


5.   Sanitize the Pump and Basin


After you have cleaned out the pump, the next step should be to sanitize the pump and basin. Make sure you sanitize all cracks and crevices to prevent mold growth.


6.   Use a Vacuum


After the cleaning is done, use a vacuum cleaner to remove the remaining water and debris inside the sump pump. Once you are done using the vacuum, don’t forget to empty the vacuum cleaner because leaving it full of dirty water can promote mold growth inside your appliance.


7.   Reconnect the Pump


The final step in your cleaning process should be to reconnect the sump pump and the sump pit. After that, attach the discharge pipe, add the screws, and plug the pump into the power supply. Turn on the power, and fill the basin with water to check if the pump is properly working.


Contact a Reliable Plumber for Your Drain Cleaning Needs


If you have an issue with clogged drains, it’s vital to contact a professional plumber immediately for help. Contact your local Pasadena drain cleaning service to schedule an appointment.

5 Refrigerator Features to Look Out For 2021

You’ve been looking to replace your refrigerator for a while now. Maybe you’d like to try out one of those smart refrigerators that can connect to Wi-Fi, or you’d like a different style of fridge for your household needs. In this modern age, there are a variety of refrigerators emerging from different brands that have a lot of convenient and interesting features. Would these details fit what your household needs? Here are 5 refrigerator features to look out for in 2021:


  • Wi-FI Connectivity: One of the most appealing features for many tech-savvy families is a smart refrigerator that can connect to Wi-Fi and offer owners the chance to remotely monitor fridge contents, make a shopping list, keep track of expiration dates, and much more. Many fridges, such as those from the Samsung brand, also have touchscreen panels that allow you browse the web, listen to music, browse recipes, and leave family reminders on a virtual board. Pretty neat, huh?
  • Energy Efficiency: If you’ve had a refrigerator for the last 16 years or so, chances are it’s using twice the amount of energy as most Energy Star Models, and hiking up your annual utility bills by hundreds of dollars. Keep an eye out for the Energy Star logo on modern fridges, as these have enhanced gaskets that seal tightly to prevent air from seeping out while you raid the fridge.
  • Glass Doors: A refrigerator with glass doors can lead to less time spent looking inside the fridge when searching for snacks. By being able to view fridge contents without opening the door, you’re letting uneven temperatures become a thing of the past and conserving energy.
  • Specialty Ice Dispensers: A survey conducted by Bosch (kitchen appliance extraordinaire) found that Americans consume over 400 pounds of ice each year. To match that, appliance brands are creating refrigerators with ice makers that produce high-quality ice quickly and in greater quantities.
  • Convertible Storage: If you find yourself needing more freezer space to store those buy one get two free freezer food deals you always shop, there are now some refrigerators with convertible storage spaces to meet your needs for extra freezer or refrigerator space. They also have temperature settings you can alter as well!


If you’re shopping for a new refrigerator, chances are you’re looking at hundreds of models and trying to narrow down your choices. It’s always important to take into account storage necessities and the size of your kitchen when looking for a refrigerator. As households continue to evolve and shift, appliance brands release new models of refrigerators with a variety of new features that border between convenient, impressive, and luxurious. Hopefully these newer features mentioned above will provide you with a detail you may have overlooked in your search for a refrigerator. Even the most tech-savvy fridge may need a repair or two in the future, so if you’re looking for appliance repair in Murrieta, contact Kwik Appliance Repair for a thorough repair job to keep your refrigerator working good as new!


Leaky Toilet Base: What’s the Cause?

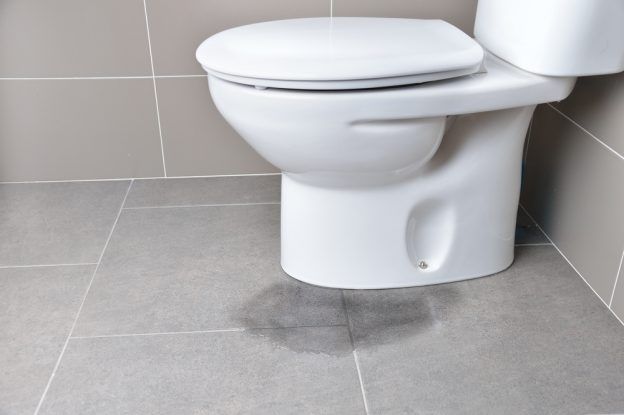
As a homeowner, it can be pretty overwhelming entering your bathroom in a hurry to find a puddle of water near the toilet or all over the bathroom floor. If a leak occurs in your bathroom, it’s critical to act fast. Ignoring these problems can lead to significant and costly repairs. If left untreated, a leaky toilet can be a massive waste of water resources and cause damage to your bathroom floor and walls.


Are you dealing with a leaky toilet base at your home and cannot figure out why it might be happening? Read on to learn more about the common causes of leaky toilet bases.


What Causes a Leaky Toilet Base?


Let’s look at a few common causes of a leak at the base of your toilet.


Condensation on the Bowl


Before you are confident that you have a leaky toilet, don’t forget to check if the water around your toilet is simply condensation. If you live in a dry and humid area, your bathroom can become very stuffy, leading to condensation on and around your toilet. To determine the cause of your toilet, you should try to wipe off the water and check again a few hours later to see if you simply have condensation.


An Issue with the Wax Ring


The wax ring around the base of your toilet is an essential component in preventing leaks. You need to make sure there is a watertight seal between the bottom of the bathroom and the sewer pipe. Check your wax ring and see if there is an issue with it. If your wax ring is worn out, it won’t fully seal the connection, causing a leak. If this is the case, don’t panic. The wax ring is affordable and can be easily replaced.


Loose T-Bolts


A leaky toilet base occurs in many cases because the t-bolts on the toilet’s base become loose. As the t-bolts hold your toilet in place and seal the drainage pipe, those becoming loose will mean that water will leak everywhere. To fix this issue, you will have to tighten the t-bolts using a wrench or a pair of pliers. Once you are done tightening the bolts, flush your toilet to check if the leak is resolved.


Cracks on the Toilet Tank


Your toilet tank is meant to hold water in. A crack in the toilet tank will undoubtedly cause water to escape from the cracks and leak onto your bathroom floor. While this isn’t a common problem because the toilet tank is built to last for decades, the cracks can be fixed using a waterproof sealant. However, if the problem persists, you might have to replace it with a new toilet.


How to Avoid a Leaky Toilet Base in the Future


Do you want to prevent a leaky toilet base in the future? First, you should ensure that toilet maintenance is scheduled every year to avoid such issues. If you don’t know enough about plumbing maintenance, you can always hire a professional to take care of things.


Contact a Professional for All Your Plumbing Needs


If you have a toilet that’s leaking, contact a reliable local Plumber in La Habra for help!

Everything You Need to Know About Residential Electric Vehicle Charging Station Installation

An electric charging station connects an electric vehicle to a source of electricity that charges the car. Chargers need to be plugged into the car’s charging slots to recharge the vehicle effectively. Today, you can find EV charging stations in various places with mobile apps available to locate the nearest station.


Have you ever wondered how much easier it would be if you had an electric charging station at your own home? It would undoubtedly make your weekly routine easier as you could charge your car right away, anytime, to go anywhere.


Before you rush into getting an electric vehicle charging station installed at your home, there are some essential things you need to consider to ensure you get the best results. Let’s discuss everything you need to know about residential electric vehicle charging station installation.


Electric Vehicle Charging Station Installation


Here is everything you need to know about the electric vehicle charging station installation process:


What Is a Level 1 Electric Vehicle Charger?


A level 1 electric vehicle charger is the most basic type of EV charger. It is a cord or charging system that comes with the vehicle when it is purchased. It can simply be plugged into a standard 120 Volt, 20 Amp circuit wall outlet in your home. The wall outlet would start providing current to the car, charging it up. It usually takes 8-12 hours to charge a fully used battery completely using this method.


Installation


Installing a level one EV charger is simple. You won’t even need to seek any professional help during this process. All you need to do is to set up the charging cord in your home, using an appropriate plug, and it’s ready to use!


What Is a Level 2 Electric Vehicle Charger?


A level 2 EV charger is a bit different from the level 1 vehicle charger. However, they work on the same mechanism, and it uses 240 volts of electricity and a 40 Amp current. The benefit of this is that it can charge your car much faster than a level 1 charger.


Installation


A level 2 EV charger requires a special installation procedure using a standard wall outlet that charges your electric vehicle. Installation of a level 2 EV charger includes a circuit breaker that needs to be attached to a 240-volt electrical source by a 4-strand cable. You’ll also need to attach a ground wire to the ground bus bar and a standard wire to the wire bus bar, with two hot wires attached to the double-pole breaker. You should undoubtedly hire a professional to handle this type of installation.


What Is a Level 3 Electric Vehicle Charger?


These are the fastest type of EV chargers available on the market. They can recharge your electric car at a rate of 3 to 20 miles of range per minute. This means you can charge your vehicle up to 80% in thirty minutes, which is much faster than a level 1 charger.


Installation

Unfortunately, these charges are only used in commercial and industrial areas. They cannot be installed at home due to their complex technology and high maintenance cost. However, this might be an excellent option for your employees and customers if you own a business.


Contact a Reliable Electrician for All Your Electrical Needs


If you need electrical work, it’s imperative to hire a licensed professional to do the job. Contact a reliable Moreno Valley electrician to schedule an appointment.

Are Charter Buses Safe?

When traveling together as a group, safety should always be your top priority. You should

make sure that you always pick the safest transportation option. Have you ever considered hiring a charter bus? Are you planning a family trip, a city tour, or going to a sporting event? Either way, hiring a charter bus can be a great way of staying together and enjoying your trip while staying safe.


Here is everything you need to know about the safety of traveling by charter bus.


What Are Charter Buses?


Charter buses are private vehicles owned by a private organization and rented by people when they want to travel from one location to another as a large group. Currently, charter buses are the most popular option for travel among people who are traveling both short and long distances. These buses usually have between 30 to 56 seats. The seating capacity can differ depending on your requirements and the charter bus company you hire.


How Safe Are Charter Buses?


While no mode of transport is 100% risk-free, charter buses are considered one of the safest ways to travel, especially if you want to travel with a bunch of people. Many regulations require the utmost safety for your charter bus transportation when it comes to charter bus safety. Many regulatory authorities inspect charter companies, keep track of repair and maintenance, test the drivers for drugs and alcohol use, and check the validity of driving licenses.


According to statistics, a total of 0.1% of bus deaths happened in 2019, which makes charter bus travel safer than ferries, cars, and motorcycles. If you haven’t booked a charter bus before, make sure to hire a reliable company with the proper license and insurance to operate in your area. You should also ask about the last inspection they had and their accident records.


What Do Charter Buses Offer Over Other Transportation?


To ensure that passengers can travel safely, many charter buses offer multiple facilities to keep the journey smooth and relaxed for everyone. These amenities include:


  • Live bus tracking for anyone you share your location with
  • Charging ports for all your gadgets
  • Central Air Conditioning System for your comfort
  • Emergency exits in case of accidents or road blockages
  • 24/7 Wi-Fi connectivity
  • Bathroom facilities


Before booking a charter bus service, it is recommended that you ensure the charter bus is in good working conditions. Ask your company about their routine maintenance. Check into online reviews and look at their customer service. It is also essential for the charter bus to be fully registered with the relevant authorities so that you can travel on the bus with the confidence of reaching your destination safely and soundly.


With the right charter bus company, you can benefit from excellent accommodations, great amenities, and a safe and stress-free way to get to your destination. A licensed, registered, and quality charter bus company is undoubtedly one of the safest means of transportation on the road today.


Hire a Reliable Charter Bus Company to Make the Most of Your Trip


If you want to make the most of your trip, hire a reliable Los Angeles charter bus company for your transportation.

How to Clean a Glass Stovetop

People love glass stoves for their minimalistic look and their ability to blend in any modern kitchen design. Having a glass stove is excellent, as you don’t have to clean burner grates or replace drip pans. Unfortunately, on the other hand, the slightest splatter or spill looks horrible on a glass stove which should be cleaned after each use.


Before starting the cleaning process, always make sure that the glass stovetop is cool for safety and to prevent any damage. Make sure to consult your manufacturer before using any cleaning products. Cleaning a glass stovetop is not that hard. Still, there are some essential tips to help you avoid damage to your stovetop. Let’s walk through the process.


Steps to Clean a Glass Stovetop


Here are the essential steps necessary to clean your glass stovetop:


  1. Dampen a reusable cloth or sponge with water and dishwasher soap mixture and wipe off any spill marks or stains on the stovetop.
  2. Always try to start the process with the products available in your pantry so you can save both money and time. Start by spraying some vinegar on the surface as a degreaser, then gently wipe down the surface using a cloth. Don’t use any sourcing pads or scrub brushes.
  3. There will always be stubborn liquid stains or marks on your stovetop. You can use a straight blade very carefully to remove buildup.
  4. Lastly, wash away the dirty water remaining with paper towels or clothes.


Baking Soda and Water Mixture


If vinegar does not seem to help much, sprinkle baking soda on the stovetop and let it rest for some time. To save yourself from scrubbing and scratching stubborn marks on your stove, try to add the cleaning task to your weekly routine. It will help you avoid a significant buildup that’s hard to remove.


Make sure you thoroughly rinse off and remove any cleaning product remaining on your glass top as it can damage your investment.  If you are concerned about the germs or bacteria lying on the cooktop, then using lukewarm water for the cleaning process will be more effective. It also helps loosen the strong and stubborn pieces of food stuck on the glass.


How to Clean Off Burnt Stains on Cooktop


If you wonder how to clean off burnt or baking stains on the stovetop, here is the solution. With the help of a 45-degree razor blade, you can very carefully scrape off the burnt pieces sticking to the glass. Make sure you use a knife specifically made for cleaning cooktops. If the burnt food seems too hard or sticky, try loosening it up a bit with warm water to let it soften before scraping it off with the razor. Repeat this process until your stovetop is clean, then spray the vinegar solution and thoroughly wipe down your surface to remove any stains left behind.


Contact a Reliable Glass Company for All Your Needs


If you need help with your skylights, contact a reliable High Desert glass company to schedule an appointment.

« Older posts

© 2024 Bankrupt Cook

Theme by Anders NorenUp ↑